

404 is an error that is displayed when the server fails to locate the page or file that the user requests. Now, that’s the technical reason.
In other words, 404 errors are frustrating errors caused when a user clicks on an invalid URL.
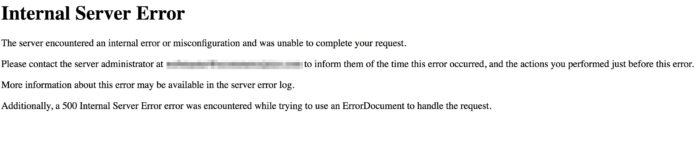
It essentially forms a dead end for the user, since he can do nothing else but return to the homepage or go to a different site. It goes without saying that an unfriendly and blunt 404 page may result in visitors being dissatisfied or annoyed with the site’s user interface and cause loss of traffic.
On the other hand, a friendly and humorous 404 page may soothe the nerves of the user and encourage him to check out other sections of the site, effectively decreasing bounce rates.
How are 404 pages important for us ecommerce marketers?
Compared to normal websites, ecommerce stores have 3 special features in this regard:
- Constantly updated product pages
- Constantly updated category pages
- URLs generated from search filters
All these three factors contribute to one major problem- a number of 404 errors on your website.
How many times have you come across product pages that showed blunt 404 errors? And how many times have you come across socially shared URLs of some hot new product on eBay or Etsy that showed you a nasty 404 error?
Now, what’s the solution for this problem?
Well, some 404 errors are inevitable. If a user types a wrong URL, the server will inevitably return a 404 error. But in such a situation, you can always choose what to show the user using a custom 404 page.
You’ll have several advantages by creating a custom 404 page for the website, some of which include:
Help visitors find their way around:
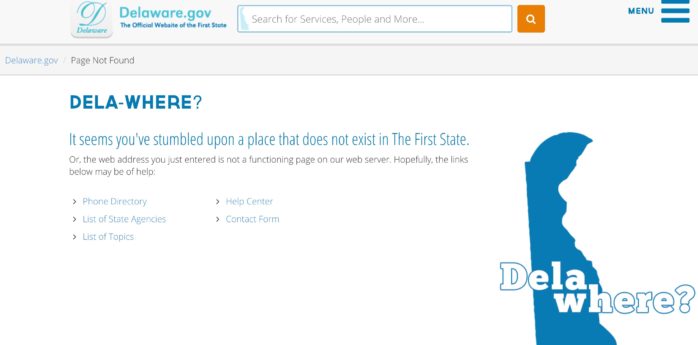
Include a set of links to important sections of the site and try to tempt a lost visitor to check out those sections by adding a line or two about their attractions. Otherwise, he’ll have to go all the way back to the homepage and rummage through the site’s contents to find what he’s looking for.
Delaware.gov does this beautifully:
Make the error page user-friendly:
By making the 404 page friendly and welcoming, we can ease the user’s frustration, rather than increasing it with a blunt “Error” pasted across the page. Some humor won’t hurt too.
Distilled does this well with some humor:

Leverage on SEO benefits:
The single greatest benefit a custom 404 page can do for your SEO is reduce your bounce rates- which can otherwise be huge for 404 pages.
Customize the error page to make it resemble the other pages of the site and provide a site search option or a sitemap link that can route users back into the site.
This way we can ensure that our SEO doesn’t take a significant hit due to the error.
How to Create a Great Custom 404 Error Page
Creating a custom 404 page is fairly easy if one knows coding. Just create a new web page on your site (either on the Content Management System (CMS) such as WordPress or a regular HTML page/PHP script).
However, before we go about creating our custom 404 error page, there are some things that we need to keep in mind:
- Focus on pleasant vibes: Remember, one of the primary reasons why we’re creating a custom 404 page is to replace the blunt and annoying “page cannot be displayed” message with something which is less likely to chase away visitors.
- Include a search box: Also ensure to place a search box at a prominent location in your custom 404 page. This enables the lost visitor to search what he’s looking for.
- Include important links: We know that a 404 error page is a dead end. Now our task is to offer alternative courses of action to the visitor.
We can do this by providing links to important and popular sections of the site like recent posts, subscriptions, contact us, etc.
- Do not make the visitor feel stupid: Most 404 pages accuse visitors of doing something wrong, and this is a no-no.
While the user may have entered an incorrect link, do not blame them for the error. Instead, explain the problem in a casual and humorous way. There is no good in pointing fingers.
- Keep things casual: Basically, it’s a good idea to keep the design of the custom 404 page casual and funny in a light manner.
But one can also push things to the other end of the spectrum. This means that we can try and make a major impact on the viewer of our 404 page.
We can do this by using humor, irony, or creativity to such an extent that it remains in the memory of our visitor who may later end up sharing it with his friends.
BlueDaniel.com’s 404 page is a great example for this:

Now, onto how to set up a custom 404 page:
If the website hosting is done on free hosts such as Tripod or Geocities, we’re in for a bit of bad luck. Customizing the 404 error page cannot be done as these free web hosts by default do not offer this facility.
However, if the hosting is done on a commercial web host, then we shall be able to customize the 404 error page with ease.
Step 1: Create the customized error 404 page
The best option is to get this done using your HTML developer, but I’ll show you the lazy way to do it:
- Fire up your HTML editor.
- Next, we need to get our page layout ready. To do this, just open your website in the browser and navigate to a simple no-frills page such as ‘about us’ or ‘contact us’.
- Click on View->source. Now copy that code and paste it into the editor. That’s it- the page layout is ready.
- Now comes the important part- customizing the error page. There is CSS involved, so I won’t be going into that. But for newbies, you can simply add some text that is friendly, humorous and helpful to the user.
Make sure you include a search box for the site, some helpful links as well as a link to your sitemap.
5. Once you’re done, save the page as ‘404.html’.
Step 2: Upload the page to the website
Establish a connection to the website using an FTP client. This can also be done through a file manager provided by the web host.
Once connected, upload the 404.html file to the website folder. Now open www.<website>.com/404.html and ensure that everything shows up the way you want it.
Step 3: Configuring the server to redirect to our custom 404 page
So far so good, huh?
Now let’s take a look at how we can configure the server to redirect to our custom 404 page every time there’s a 404 error. I’ll show you how to do this in both Windows and Apache servers.
In Microsoft’s Windows Servers, it will take just around 10 steps of mostly point-and-click stuff. On Apache, it takes just 3 steps.
The Windows Server method
- Create a connection to the server using a remote desktop connection or any other remote access software.
- Fire up the Internet Information Services Manager.
- Click on the ‘Web Sites’ folder.
- In the list that comes up, look for our website and select it.
- Go to Action < Properties
- A window will appear. Click on the ‘Custom Errors’ tab.
- In the long list that comes up, locate ‘404’.
- Now click on ‘edit’ and then ‘browse’ and locate the 404.html file that we had created earlier.
- Now click on ‘ok’ and then ‘apply’.
- That’s it. We’re done! Check out if things are working fine by opening the web browser and ‘www.<website>.com/asdf.
The Apache method
If your commercial web host already offers a way to create a customized 404 error page, then you might find it mentioned somewhere in the documentation they provide.
Usually, they’ll mention something about how you can customize a file called “.htaccess”. This will let you customize your 404 error page.
Apache web servers use “.htaccess” file to let users customize their web server configurations at the directory level. However, different web servers have different techniques to manage customization of the 404 error page.
Step 1: Creating the “.htaccess” file: This first step is not mandatory in every situation. In most cases, you may already have a .htaccess file setup.
Certain web hosts have their web server setup in such a manner that it will search for a particular file in the web directory when a certain file or page cannot be located. In such a case, proceed directly to step 2.
Step 2: Add the following text to the “.htaccess” file: ErrorDocument 404 /404.html
This line names our 404 error page as ‘404.html’ and locates it in our web site’s root directory.
Step 3: Save the file and upload it to the website directory (usually public_html).
Step 4: See if everything’s working fine by opening the web browser and going to www.<website>.com/asdf.
Note: In case you’re wondering how to do this on any of the popular eCommerce platforms such as Shopify or BigCommerce for your online store, most platforms provide 404 template files within the theme itself that you can simply edit. It’s easier than the process we’ve detailed.
What not to do:
What are the no-no’s when you set up your custom 404 page?
- Never redirect the 404 errors to a different website. This causes confusion.
- Never redirect 404 errors to the website’s homepage. This is again confusing and can cause a spike in bounce rates.
- Never redirect 404 errors to a Flash-based page.
- Not using UTM tags to track where the users are coming from. It’s imperative that you track from where the visitors are landing on your custom 404 page. This super easy using the Effin Amazing A/B Tester Calculator or the Google Analytics URL Builder (UTM.io). Whatever page you need to create a UTM, simply click the Effin Amazing UTM Builder icon (or UTM.io), fill in your source, medium, campaign, and click copy to get a trackable shortened link that you can use and track your traffic. You can find more useful growth hacking Chrome extensions here.